Tonight I have the 3rd installment of my Nail Care Series. We are going to tackle top coats today. As I stated in my other installments, I want to remind everyone these are just my preferences. Everyone reacts differently to products, and I can not promise that everyone will have the same positive experience with these products as I do.
TOP COATS

My Current Favorite combination to date that I use most often is:
NYC Grand Central Station and Seche Vite.

Grand Central is a pretty impressive fast dry top coat that I apply under my Seche Vite. It is very inexpensive and works perfectly for what I need it to. It can be purchased at most drug stores.

Next is Seche Vite. Now, you may be asking yourself why I use BOTH. Why do I layer NYC Grand Central under my Seche Vite? Reason: Seche Vite is one of those top coats that has crazy behavioral problems. Mainly it causes what is called 'shrinkage'. This doesn't occur in all users, but it does with me.
Shrinkage: When the top coat causes the nail polish below to shrink ,so to speak, and pull away from the nail edges. It's most evident on the free edge (tip of your nail). The best and easiest way to describe it would be: It makes your nails look as if the polish you have on is worn out like tip wear.
Seche Vite is infamous for shrinkage. You can prevent shrinkage by thinning the polish with Restore or you can layer it over another top coat, and that is what I do. It may seem like a waste to use another top coat underneath, but it is very worth it. To date I have not found a better top coat than Seche Vite.
POSITIVES:
*Self Leveling
(levels everything better than any other top coat)
*Best Shine
*Fastest Drying Time
NEGATIVES:
*Causes Shrinkage
*Needs to be thinned CONSTANTLY
Keep in mind if you would like to use Seche Vite you have to decide if the extra steps are worth it for you, and for me they are. Seche Vite can be purchased at Sally's Beauty Supply.
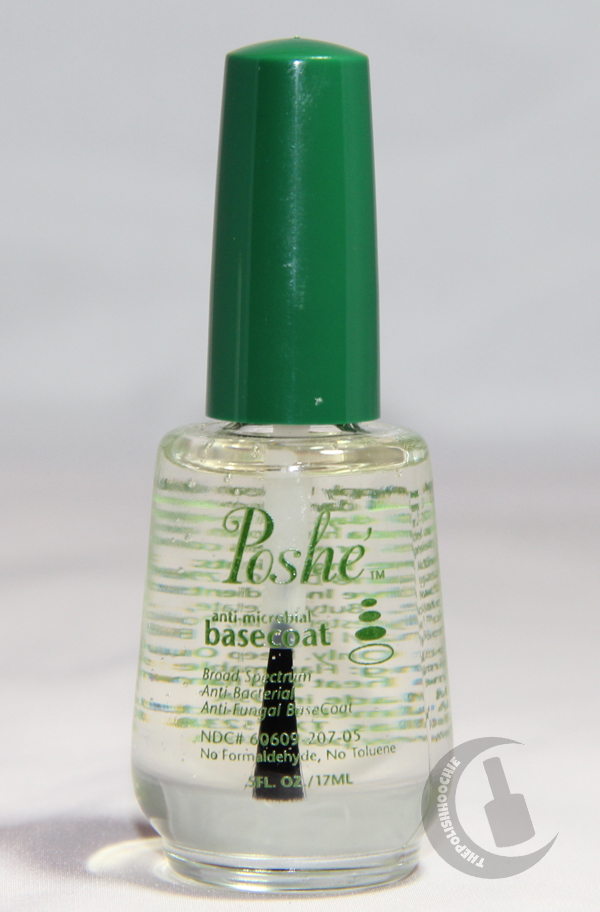
Next up is Posh. A lot of people that refuse to use Seche Vite tend to use this as an alternative. It does not seem to have the shrinkage problems that Seche Vite has. It is not without its faults as well. To me this tends to be too temperamental for me. Some times I have great luck with it and others I do not. I have had polishes where it wrinkled the finish completely and I had to start over. It does not dry as fast as Seche Vite and it is not as shiny. The times it does work, it is a nice top coat. I have not decided if I'm going to purchase this again once I finish off this existing bottle.This polish also needs thinner regularly to keep it from getting too thick. Posh can be purchased at Sally's Beauty Supply.

Next is Good to Go by Essie. This top coat I LOVE. It does not dry as fast as Seche Vite, but it is very shiny. It does not require the thinning that the two others above do, and it does not cause shrinkage. Unfortunately, it does not have that beautiful self leveling property that Seche Vite has that I really love and think is very important in a top coat. This can be purchased at Walgreens.

(*please note that both the Good to Go and Posh do not have a normal faint pink coloring, this is because I used them on red polishes that caused the discoloration).
The next two polishes I use occasionally, they are both also popular favorites with the nail blogging community. Sally Hansen's Mega Shine and Insta-Dry. Both of these polishes can be purchased in any major drug store. I know many nail bloggers that swear by these two top coats. I like both, but to me they lack the self leveling power, shine, and drying speed that Seche Vite has.


Many will argue that they are better than Seche Vite, so I believe it is a personal preference. I think it's bet to try each, until you find the one that really wows you.
Another top coat that I use often is Seche Vite UV. There are times when I have ZERO time and need my nails to dry yesterday. This is when I turn to this.

This can be purchased at Sally Beauty Supply and is an absolute MUST for me at times. This does require the use of a UV LAMP/LIGHT. After applying this I place my hands under the dryer, and in minutes my polish is dried solid. I can be washing dishes and cleaning within 20 minutes or less. I swear by this stuff and if you can afford to purchase a light, this is a must have. I will go into more detail on my light in my last and final installment of this series, so stay tuned for that.
Another must have top coat for me is Glitter Food (aka Fix a Flat) by Nail Pattern Boldness. Glitter Food can be purchased HERE. This is a must for the glitter junkies out there like myself. If you want a really smooth finish to a normally bumpy glitter... this is this answer. I apply one or two coats of this and then finish it off with Seche Vite. The reason I finish it off with Seche Vite is Glitter Food does dry matte, so add your favorite top coat to bring back the shine. I have had the bumpiest of all glitters feel smooth as glass after applying this.

Last in my arsenal of must have top coats is MATTE top coat. Everyone should own at least one of these. I have tried both China Glaze Matte Magic and Hard Candy's matte top coat.

I prefer, by far, Hard Candy's. It applies much easier for me and is much more affordable. Unfortunately, Hard Candy just discontinued this when they introduced their new line recently. It was pretty heart breaking for me because I will have to search for a new brand. I was smart enough to raid my local Walmarts and collect up as many as I could find before Hard Candy switched over to the new line.

These should last me for awhile. I will have to face it eventually, just not any time soon :)
I hope the following information was helpful. If you have any questions or comments please leave them below and I will address them as soon as I can! Thanks for visiting.

My Current Favorite combination to date that I use most often is:
NYC Grand Central Station and Seche Vite.
Grand Central is a pretty impressive fast dry top coat that I apply under my Seche Vite. It is very inexpensive and works perfectly for what I need it to. It can be purchased at most drug stores.
Next is Seche Vite. Now, you may be asking yourself why I use BOTH. Why do I layer NYC Grand Central under my Seche Vite? Reason: Seche Vite is one of those top coats that has crazy behavioral problems. Mainly it causes what is called 'shrinkage'. This doesn't occur in all users, but it does with me.
Shrinkage: When the top coat causes the nail polish below to shrink ,so to speak, and pull away from the nail edges. It's most evident on the free edge (tip of your nail). The best and easiest way to describe it would be: It makes your nails look as if the polish you have on is worn out like tip wear.
Seche Vite is infamous for shrinkage. You can prevent shrinkage by thinning the polish with Restore or you can layer it over another top coat, and that is what I do. It may seem like a waste to use another top coat underneath, but it is very worth it. To date I have not found a better top coat than Seche Vite.
POSITIVES:
*Self Leveling
(levels everything better than any other top coat)
*Best Shine
*Fastest Drying Time
NEGATIVES:
*Causes Shrinkage
*Needs to be thinned CONSTANTLY
Keep in mind if you would like to use Seche Vite you have to decide if the extra steps are worth it for you, and for me they are. Seche Vite can be purchased at Sally's Beauty Supply.
Next up is Posh. A lot of people that refuse to use Seche Vite tend to use this as an alternative. It does not seem to have the shrinkage problems that Seche Vite has. It is not without its faults as well. To me this tends to be too temperamental for me. Some times I have great luck with it and others I do not. I have had polishes where it wrinkled the finish completely and I had to start over. It does not dry as fast as Seche Vite and it is not as shiny. The times it does work, it is a nice top coat. I have not decided if I'm going to purchase this again once I finish off this existing bottle.This polish also needs thinner regularly to keep it from getting too thick. Posh can be purchased at Sally's Beauty Supply.
Next is Good to Go by Essie. This top coat I LOVE. It does not dry as fast as Seche Vite, but it is very shiny. It does not require the thinning that the two others above do, and it does not cause shrinkage. Unfortunately, it does not have that beautiful self leveling property that Seche Vite has that I really love and think is very important in a top coat. This can be purchased at Walgreens.
(*please note that both the Good to Go and Posh do not have a normal faint pink coloring, this is because I used them on red polishes that caused the discoloration).
The next two polishes I use occasionally, they are both also popular favorites with the nail blogging community. Sally Hansen's Mega Shine and Insta-Dry. Both of these polishes can be purchased in any major drug store. I know many nail bloggers that swear by these two top coats. I like both, but to me they lack the self leveling power, shine, and drying speed that Seche Vite has.
Many will argue that they are better than Seche Vite, so I believe it is a personal preference. I think it's bet to try each, until you find the one that really wows you.
Another top coat that I use often is Seche Vite UV. There are times when I have ZERO time and need my nails to dry yesterday. This is when I turn to this.
This can be purchased at Sally Beauty Supply and is an absolute MUST for me at times. This does require the use of a UV LAMP/LIGHT. After applying this I place my hands under the dryer, and in minutes my polish is dried solid. I can be washing dishes and cleaning within 20 minutes or less. I swear by this stuff and if you can afford to purchase a light, this is a must have. I will go into more detail on my light in my last and final installment of this series, so stay tuned for that.
Another must have top coat for me is Glitter Food (aka Fix a Flat) by Nail Pattern Boldness. Glitter Food can be purchased HERE. This is a must for the glitter junkies out there like myself. If you want a really smooth finish to a normally bumpy glitter... this is this answer. I apply one or two coats of this and then finish it off with Seche Vite. The reason I finish it off with Seche Vite is Glitter Food does dry matte, so add your favorite top coat to bring back the shine. I have had the bumpiest of all glitters feel smooth as glass after applying this.
Last in my arsenal of must have top coats is MATTE top coat. Everyone should own at least one of these. I have tried both China Glaze Matte Magic and Hard Candy's matte top coat.
I prefer, by far, Hard Candy's. It applies much easier for me and is much more affordable. Unfortunately, Hard Candy just discontinued this when they introduced their new line recently. It was pretty heart breaking for me because I will have to search for a new brand. I was smart enough to raid my local Walmarts and collect up as many as I could find before Hard Candy switched over to the new line.

These should last me for awhile. I will have to face it eventually, just not any time soon :)
I hope the following information was helpful. If you have any questions or comments please leave them below and I will address them as soon as I can! Thanks for visiting.